Home Automation 2 - Home Assistant basics - frontend
We have introduced Home Assistant (HA) and its installation before. So now you have two places
- frontend:
http://<host>:8123or your phone App. - config.yaml: it should be under the main folder of HA’s installation. I used docker installation, so it is under the main HA’s folder. It is the starting point of all configurations.
Starting from the frontend:
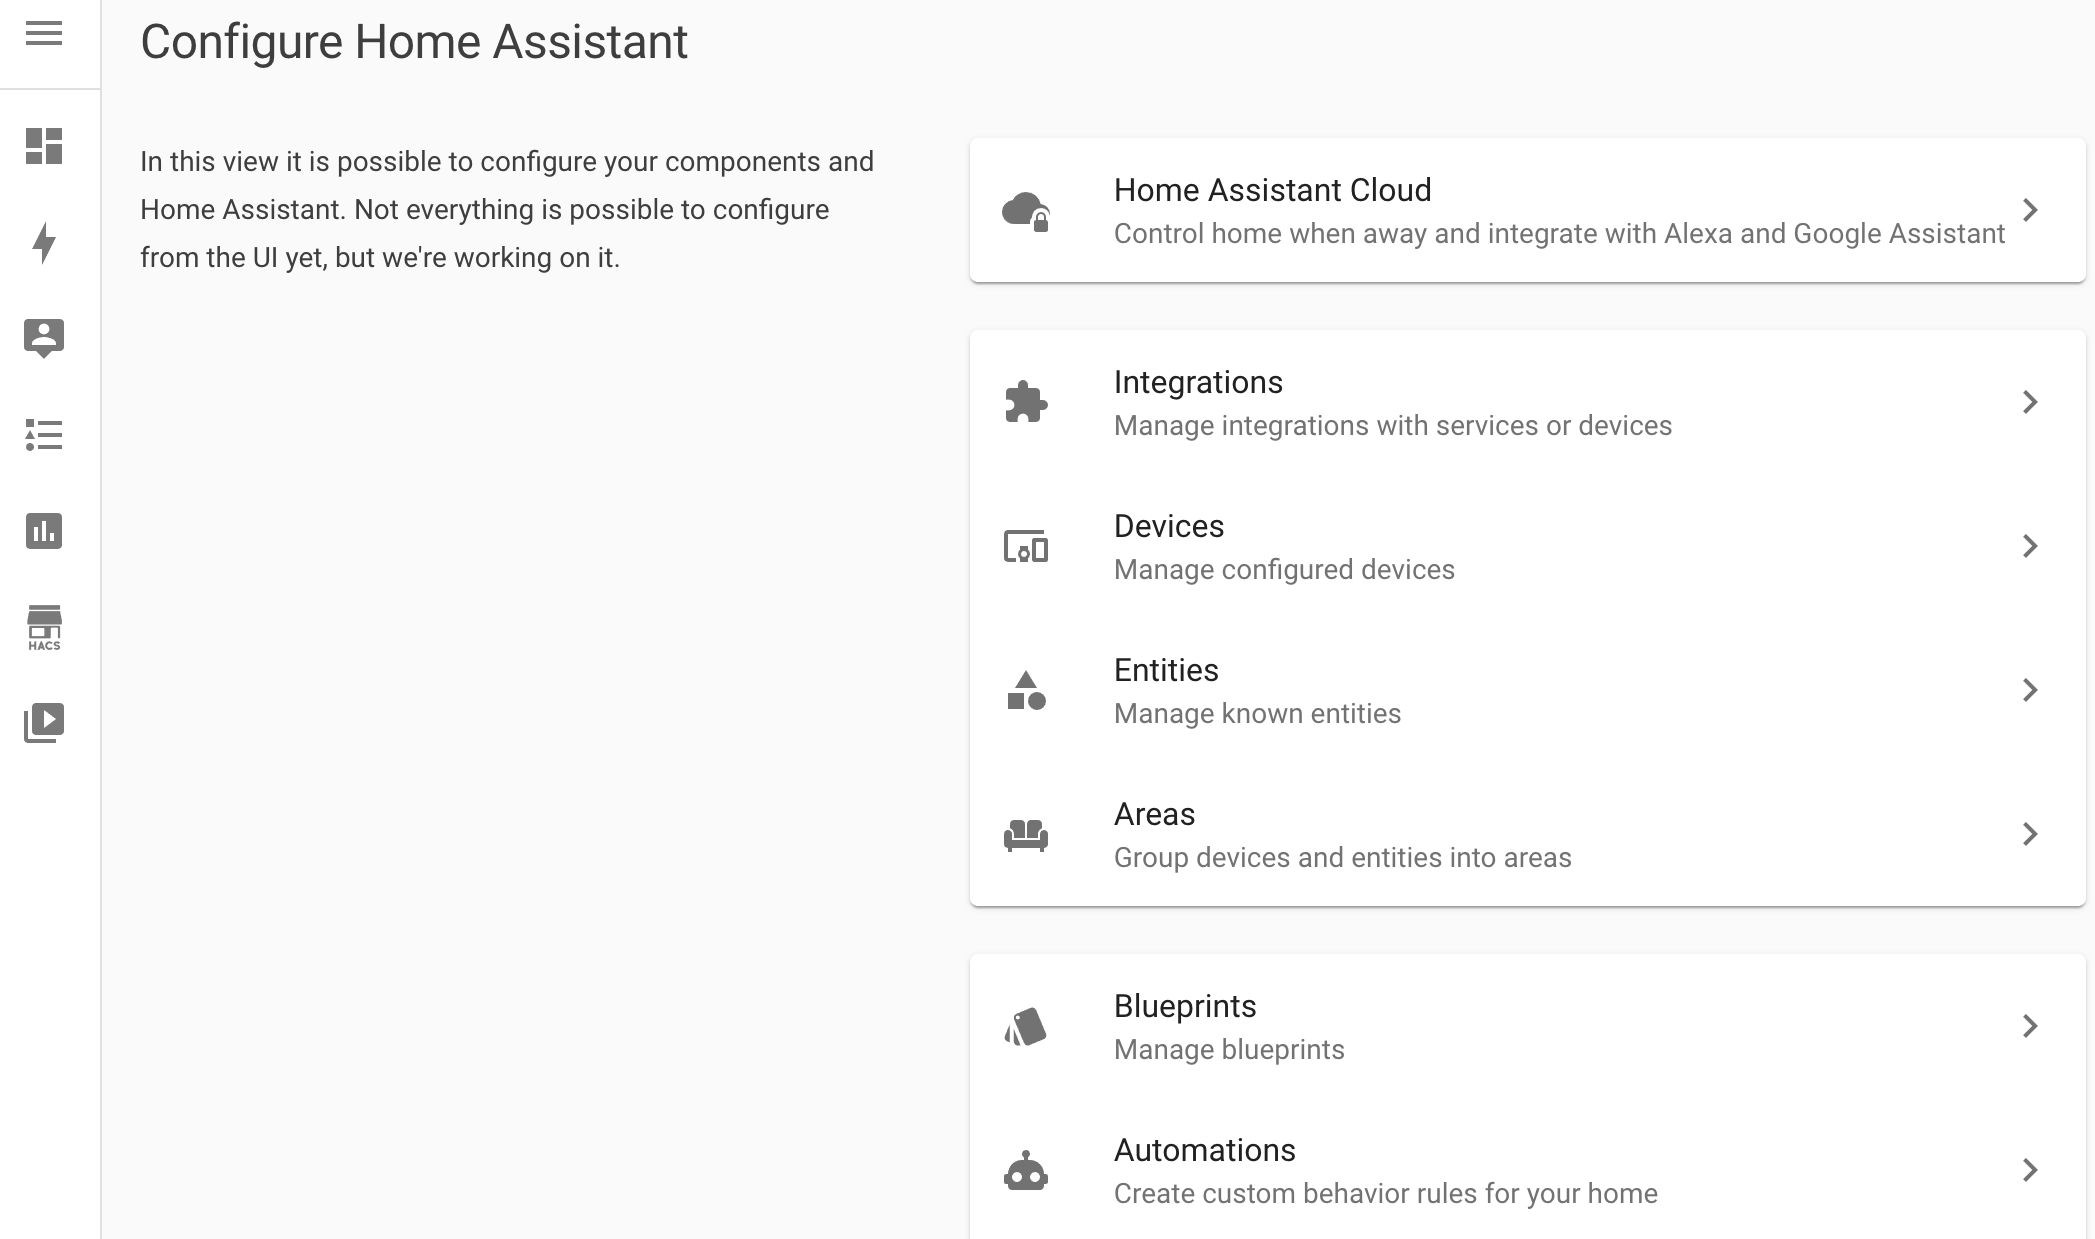
Setting - Integration
This is the place to add integration softwares/plugins written/shared by others. If you have some smart devices in the local network, it may automatically identify some already.
For example, you will need “Mobile App” to support your phone Apps. Or if you have Apple home automation, you can also add HomeKit Controller. Anyway, it is the place to check as you gradually add devices.
Setting - Devices
Here, you can see all your devices. It is easy to navigate. If you click a device, you can see all its metrics (called entities) and other related stuff like automation/scripts, which we will introduce shortly.
Setting - Entities
Entity is the most elementary concept in HA. It represent one metric, which could have different form (boolean, string, numeric, etc.), and it can also have a few other meta data, such as icon, alias, unit and etc. It represent one thing you care about, e.g., temperature in a particular room.
A device could publish multiple entities, and you can later set them up in dashboard or hook it up with alerts or automations.
Setting - Automations
This is a place things get interesting. You can set up your own logic to connect all the dots.
An automation is a process that will “do something” when “some thing” “happens” under “some condition(s)”. From the sentence, every automation has 4 components:
- “something”: it can be a entity (most common), or some device, time. Anything HA can track. Let’s use temperature as an example.
- “happens”: it is tied to “something”. You just need to set up some criteria. In our example, let’s say it means the temperature falls below 5 degree.
- “condition(s)”: this is another filter to allow nesting with the trigger. Say you only care about such events during night time. So we can set up the condition as from 9pm to 6am.
- “do something”: the most basic one is to send an alert (call_service: notify._XXXXX). In our example, let’s assume we can control via HA. So when all above points are triggered, HA will turn on your home heat.
Things can get creative from here on.
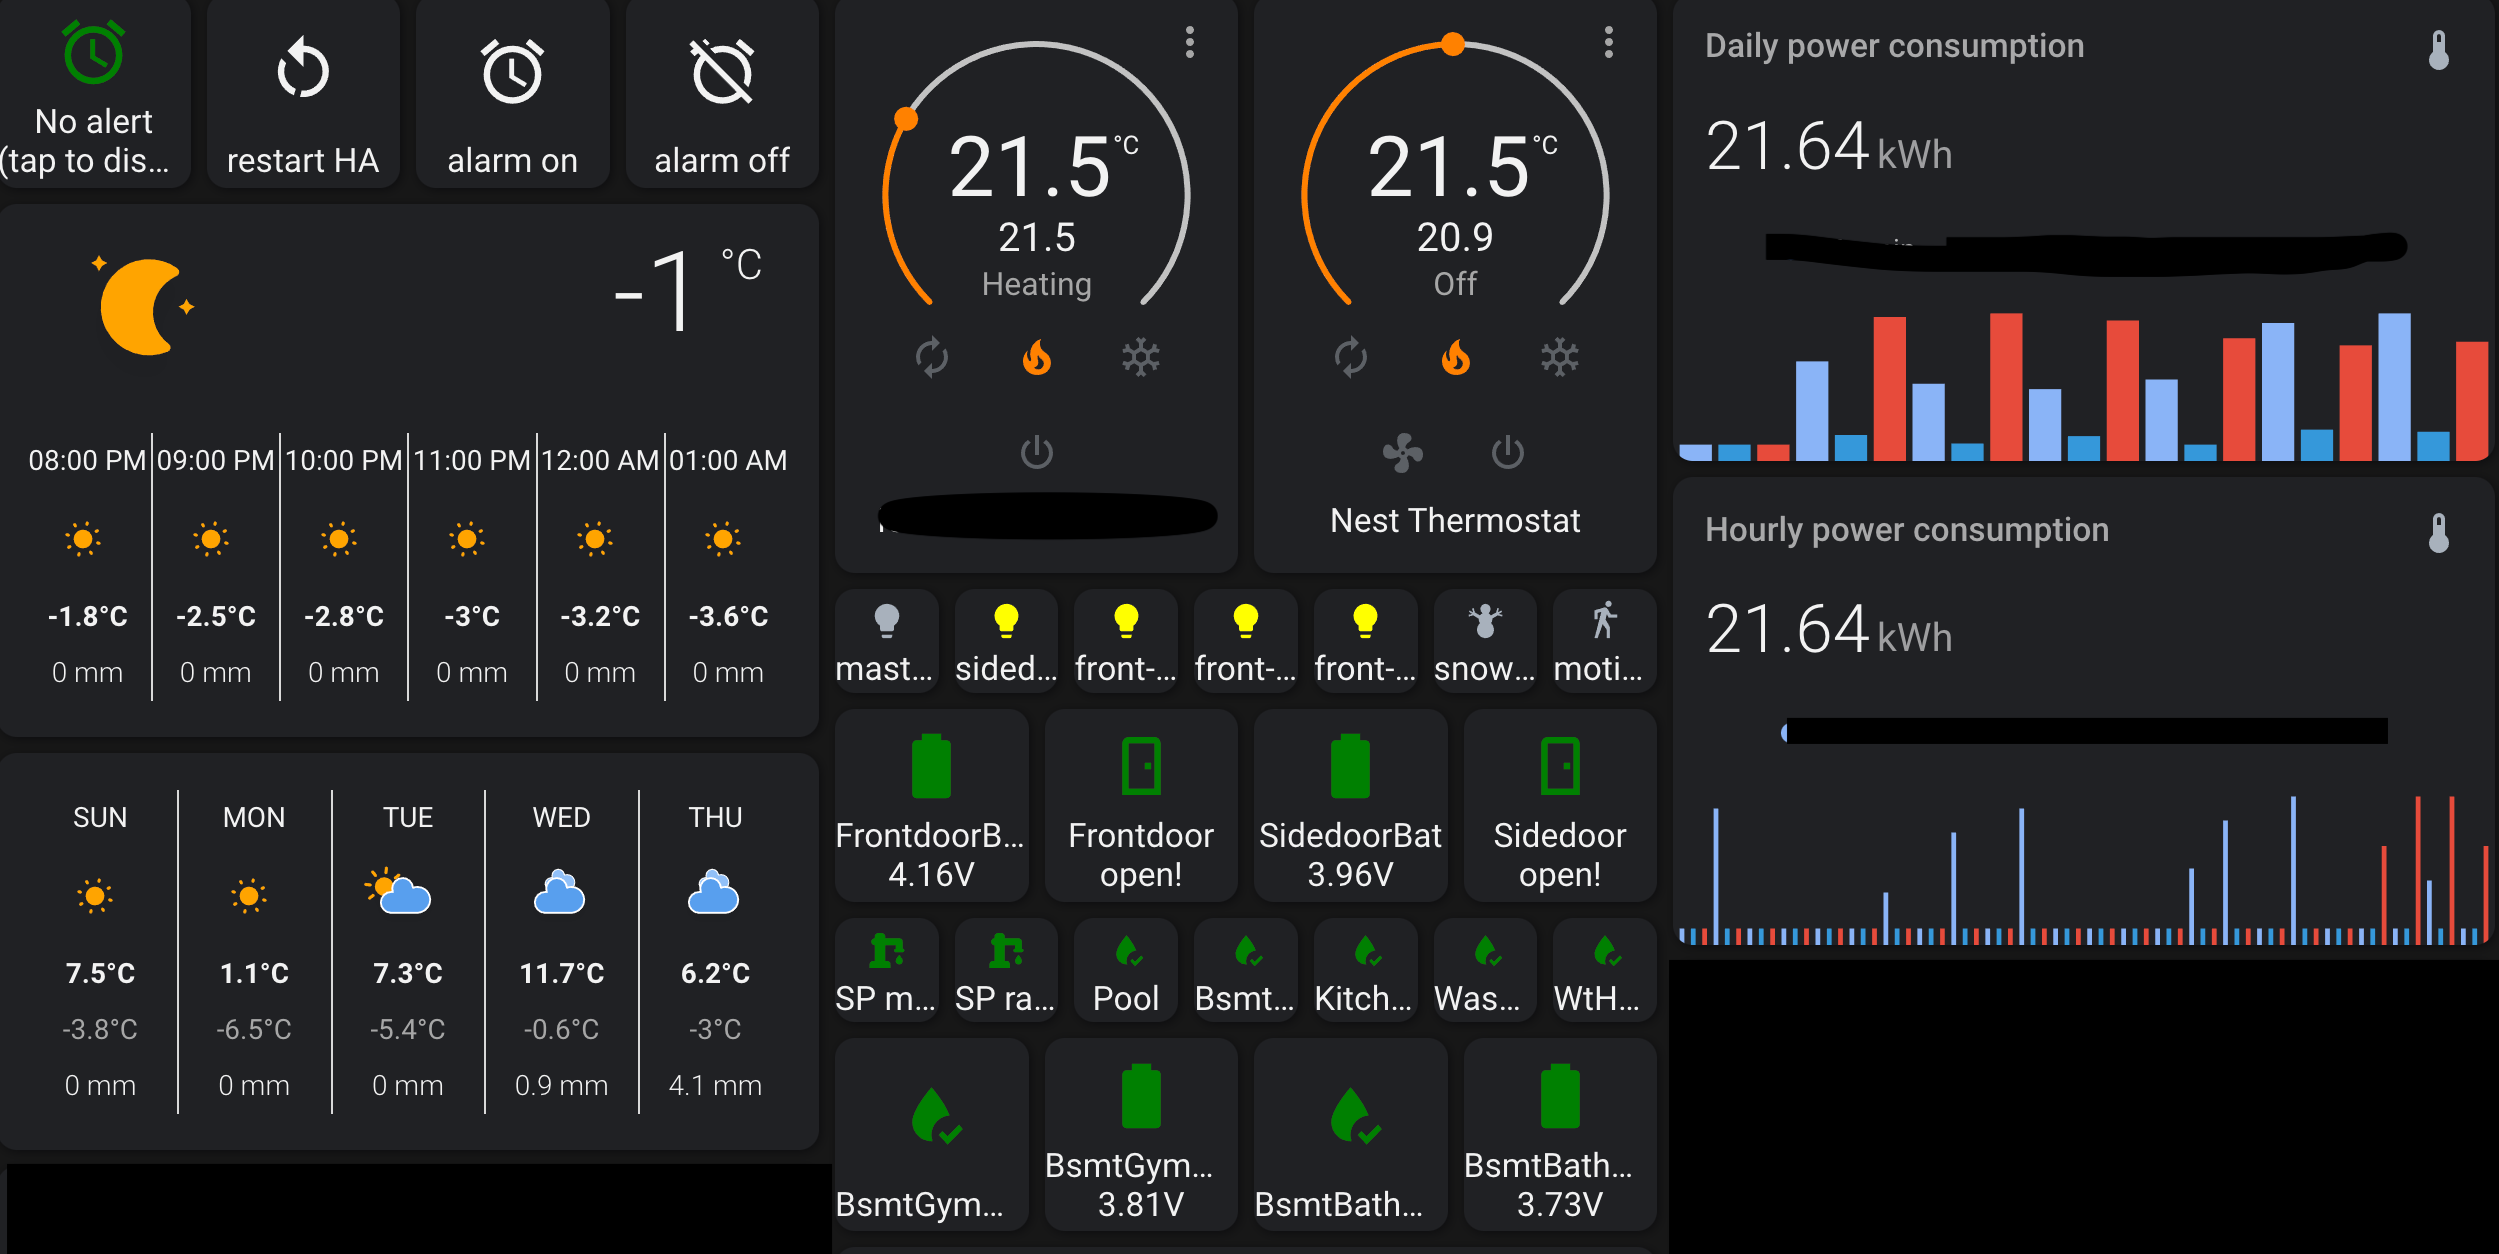
Dashboard - Overview
The Overview dashboard is probably the page you will stare at the most. As you started to have more integrated devices, you can start adding more and more stuff here.
Just to list a few examples
- weather: build-in weather card is pretty good
- custom:button-card: an add-on which is highly recommended. It can handle all kinds of button, and can set up actions (change color/icon and trigger events).
- custom:mini-graph-card: very flexible plotting tool with nice display.
Next, we will introduce more about playing with configurations not through frontend.